Are you looking for ways to create a green and energy-efficient environment in your home? Do you wish to save on those hefty energy bills every month? If so, installing a solar panel wall mount may be the best solution available. I know it doesn’t sound very safe at first. But trust me, with a little patience and effort, you can absolutely handle this project yourself!
A directly mounted solar panel on your wall not only lets you harness the sun’s infinite power but it also saves up an immense amount of space in your yard or roof. With basic tools and materials, setting up your own solar panel wall mount isn’t as complex as it might look.
You will have to secure the solar panels onto the mounts, attach them correctly to the selected wall area, connect them efficiently to a power source, and ensure perfect positioning for optimal light exposure.
What You’ll Find In This Article:
- A comprehensive guide on DIY Solar Panel Wall Mount installation
- Step-by-step instructions that are easy for anyone to follow.
- A list of necessary materials for creating a DIY Solar Panel Wall Mount.
- Explanation of how a Solar Panel Wall Mount system functions.
- Detailed safety precautions for installing a DIY Solar Panel Wall Mount.
- Tips on ensuring stability and durability of your DIY Solar Panels.
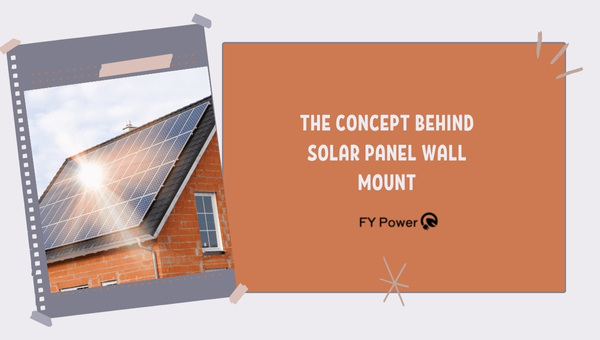
The Concept Behind Solar Panel Wall Mount
The whole idea of a solar panel wall mount is to harness the power of the sun by converting it into usable electricity, right from your own home or building. But how exactly does this work? And what are the benefits? Let’s delve further and get a broader view of this concept.
How Does A Solar Panel Wall Mount Work?
Let’s understand how it works!
- Sunlight Absorption: The first step involves harnessing sunlight using photovoltaic cells embedded in the solar panels. These cells act as a converting agent, which transforms sunlight into electricity.
- Conversion of Solar Energy: This absorbed sunlight energy isn’t immediately usable; it’s in the form of DC power (Direct Current). To make it accessible for general use, an inverter that comes with your mounting system converts this DC power into AC power (Alternating current). It is this AC power that we utilize to run appliances and other electrical devices.
- Battery Storage: When installed correctly, your panels may produce more electricity than you consume. In such cases where there’s excess power generated, it’s stored in a battery for later use like during cloudy days or at night.
- Metering System: Lastly, the system can be connected to a meter that monitors electricity production and consumption levels so you can track how much renewable energy you are producing and efficiently manage your energy usage!
Isn’t it marvelous how from merely soaking up light, we can enjoy an uninterrupted power supply?
Throughout my journey of exploring solar panel energy harnessing systems, these were some compelling advantages and intriguing mechanisms I came across that made me appreciate the thought process behind developing a wall-mounted solar panel system!
Also Read: How to Easily Tune up Your Generator
The Advantages of Wall-Mounted Solar Panels
When I first ventured into the realm of solar energy, I thought, why would anyone want to mount their solar panels on walls? It seemed counterintuitive at first. But when I dived deeper into understanding the concept of a solar panel wall mount system, everything made sense.
- Space-Saving: If you’re like me, with more vertical space than horizontal space in your property (courtesy of tight city spaces), then wall mounting is like hitting two birds with one stone. It enables you to utilize that unused vertical surface efficiently!
- Aesthetic Appeal: Who doesn’t appreciate a home that stands out? A well-placed solar panel wall mount can significantly enhance the aesthetic appeal of your house or building! Just imagine looking out of your window and seeing gleaming panels soaking up sunlight instead of just an empty brick wall!
- Easier Maintenance: To be honest, cleaning isn’t my best suit! So having them at eye-level makes upkeep a walk in the park (or should I say garden!). Without needing tall ladders for routine check-ups or occasional cleaning means practically effortless maintenance.
Also Read: Champion Generators Spark Plug Gap And Socket Size
Setting up Your DIY Solar Panel Wall Mount
Are you thinking of going green and switching to solar energy? That’s a fantastic idea! To help you get started, here is my step-by-step guide to setting up your very own solar panel wall mount.
Trust me, this task may appear difficult but with the right instructions and some basic tools, you will have your DIY solar panel installation done in no time.
Step-by-Step Guide to Designing Your Own Solar Panel Wall Mount
- Choose Your Solar Panel: First things first, pick out the solar panel that suits your needs and budget. There are various types of panels available in the market with different power outputs. Pick one that fits best for your energy requirements.
- Select a Suitable Wall: Next, choose a wall where you want to mount the panels. Make sure the wall can withstand the weight of the panels and ensure that it gets sunlight for a major part of the day.
- Mark Drill Points: Now take measurements of your solar panel wall mounts, then mark those measurements on your wall – these are where you’ll place drill holes.
- Drill & Secure Anchors: At each marked point, drill holes into the brickwork or siding and insert anchors.
- Install Brackets: Secure brackets onto these anchors with screws using a screwdriver or drill machine; these will hold up your ‘solar panel wall mount’.
- Mount Your Solar Panels: Finally, slide your solar panels into place on top of these brackets and make sure they’re properly secured to avoid any mishaps.
Now that we’ve covered ‘how’ to design a solar panel wall mount let’s talk about ‘what’ you need so we can jump right in without any interruptions!
Necessary Materials for Creating a DIY Solar Panel Wall Mount
Creating a ‘DIY solar panel wall mount’ needs some specific materials. Here’s a list of those:
- Solar Panels: Of course, what would you mount without them? Choose panels based on your energy requirements.
- Mounting Hardware: This typically includes brackets, screws and anchors. These are essential to secure your solar panels to the wall.
- Tools: A power drill, screwdriver, level, and measuring tape are a few basic tools you’ll need for ‘solar panel installation’.
- Protective Gear: Safety first! A hard hat, safety goggles, and gloves will help protect you during the installation process.
- Ladder (if needed): If your chosen wall is at height, ensure you have a stable ladder.
- Personal Assistant (optional): While not necessary if you’re comfortable doing manual work, an extra pair of hands often makes work lighter!
Also Read: Solar USB Charging: Build Your Own in 7 Easy Steps
Safety Precautions for Installing a DIY Solar Panel Wall Mount
Safety cannot be compromised when it comes to installing a solar panel wall mount. Let me share with you some potential risks and how to ensure the stability and durability of your DIY solar panels.
Potential Risks in Installing A Solar Panel Wall Mount
Installing a solar panel wall mount isn’t as daunting as it may seem, but it does come with its set of risks. Understanding these risks is key to ensuring safety during the installation process.
- Electrical Hazards: Handling solar panels could lead to electrical shocks if not done properly. I would advise you to wear rubber gloves and shoes as a preventive measure.
- Fall Hazards: Working at certain heights can be dangerous, especially if you’re installing the panels on an elevated surface or roof. Always use sturdy ladders or scaffolding, make sure they are well set up before starting your work.
- Heavy Lifting: Solar panels are quite heavy, which can cause injuries during lifting or installation. It’s always better to have someone assisting you with this task.
- Sharp Edges: The frames and mounts could have sharp edges that might lead to cuts if handled improperly. Wearing gloves during handling would mitigate this risk.
Avoid these hazards by following safety measures such as wearing personal protective equipment (PPE) and not working alone especially when lifting heavy items like solar panels onto their mounts.
Ensuring Stability and Durability of Your DIY Solar Panels
Once we’ve covered the safety part of installing, let’s dive into how we can ensure that our DIY solar panel wall mount is secure and built for durability:
- Secure Mounting Brackets: Use high-quality mounting brackets that are rust-resistant and durable. They should be firmly secured to the wall with screws designed for heavy-duty usage.
- Use a Level: Always use a level during installation to ensure your solar panels are perfectly flat. This not only maximizes their efficiency but also ensures that they’re secure and well-mounted.
- Proper Angling: The angle at which the panel is mounted on the wall can impact its stability in windy conditions; hence it’s crucial that proper angling be considered during installation.
- Regular Maintenance: Regularly check the mounts and brackets for any signs of wear or corrosion which could affect their integrity over time.
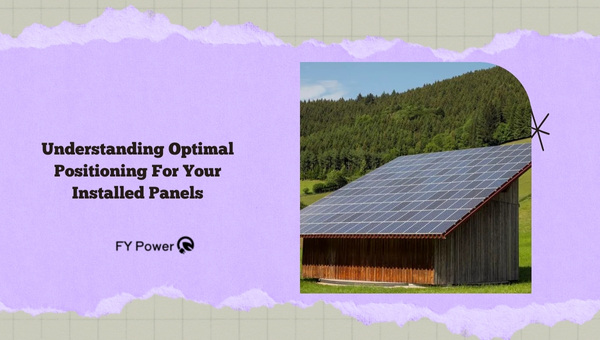
Understanding Optimal Positioning For Your Installed Panels
When it comes to solar panel installation, achieving the highest efficiency is a common goal. This efficiency is greatly influenced by how well your panels catch the sun’s rays. It’s not just about mounting them on the wall; it’s also about getting the angle and position just right.
Maximizing Sun Exposure for Your Wall-Mounted Panels
The positioning of your solar panels plays an incredible role in optimizing their performance. With a suitable setup, your panels could enjoy maximum sun exposure, leading to genial efficiency.
- Understand Sun Patterns: The earth rotates from East to West, which means that sunlight comes primarily from these two directions. Therefore, I suggest placing your solar panel wall mount towards the South (for those in the Northern Hemisphere) or North (for Southern Hemisphere dwellers) to gain maximum exposure.
- Observe Shadow Play: Always look out for potential shadow-casting objects such as trees or tall buildings nearby that could hinder sunlight from reaching your panels efficiently throughout the day.
- Consider Panel Elevation: I encourage you to mount your solar panels at a certain elevation angle depending on your geographic coordinates—typically an angle equal to your latitude for optimal performance year-round.
About Adjustments & Tilt Angle in DIY Solar Panel Wall Mounts
Every season brings specific solar intensities and wavelengths due to changes in Earth’s position relative to the sun. To maximize seasonal efficiency of my DIY Solar Panel Wall Mount, adjusting tilt angles becomes critical:
- Summer Adjustment: During summer solstice (longest day of the year), the sun is higher in the sky. To capture maximum sunlight, it’s best to tilt your panels at a lower angle—approximately 15 degrees below your local latitude.
- Winter Adjustment: In winter solstice (shortest daylight period), the sun is lower in the sky and stays there for short duration. Consequently, panels should be adjusted to a steeper angle—about 15 degrees more than your local latitude.
- Spring & Autumn Adjustment: During spring and autumn equinoxes, when daylight hours roughly equal nighttime hours, set your solar panel mount tilt angle close to your geographical latitude.
FAQs
Can all types of solar panels be mounted on walls?
Yes, most types of solar panels can be mounted on walls. However, it’s important to consider factors like panel size, weight, and wall load capacities before deciding on a solar panel wall mount.
What is the recommended angle for your mounted panels?
The optimal angle varies based on geographical location and season. Generally, for cities in the temperate zone (non-tropical areas), a good starting point is an angle equal to the latitude.
Is there any maintenance necessary for a properly installed wall-mounted system?
Yes, routine maintenance including inspection for damage and regular cleaning will help ensure maximum performance of your solar panel mounting system. Also performing periodic checks to ensure your solar panels’ spark plug gap are in line with manufacturer recommendations will ensure longevity.
Conclusion
Creating a solar panel wall mount may seem daunting but the reward is worth the effort. With this comprehensive guide, I’ve shared my knowledge on designing, building, and installing a unique solar panel mounting system.
It not only offers an eco-friendly power option but also lets your home stand out with a trendy aesthetic. However, always remember to prioritize safety while doing these installations because it involves risky steps that require adequate precautions.
Key Takeaway Points
- Wall-mounted solar panels save space and add beauty to your home.
- Solar panel wall mounts use basic mechanical concepts for functioning.
- Necessary materials for a DIY project are easily available.
- Safety measures must be considered throughout the installation process.
- For optimal sun exposure, the correct positioning of your panels is crucial.