Have you ever been caught with a dead phone while out on an adventure, nowhere near a power socket? Imagine harnessing the sun’s limitless energy to charge your devices anytime, anywhere. That’s the magic of solar USB charging. It’s like having your own little power station in your backpack!
Building your own solar USB charger is easier than you might think. With just a few components and some simple tools, you can create a portable charging device that keeps your electronics powered up wherever you find sunshine. Whether for camping trips or as a backup during power outages, this DIY project puts power right in your hands.
What You’ll Discover Here:
- Unlock the secrets to DIY solar charger
- Step-by-step guidance for making Solar USB charging gear
- Simple explanations for assembling portable solar power
- Key safety tips every builder should know
Understanding the Basics of Solar USB Charging
Solar USB charging is a technology that harnesses solar energy to charge electronic devices via a USB connection.
It utilizes photovoltaic cells that convert sunlight into electricity, which is then stored in a battery or directly used to power the device. Understanding the basics of this charging method is vital for maximizing its effectiveness
What is Solar USB Charging?
Solar USB charging is a way to use sunlight to power up devices through a USB connection. In simple terms, it’s like using the sun instead of electricity from the wall to charge your phone or camera. Here’s how it works: Panels absorb light from the sun and turn it into electricity. This power then flows through a special circuit and ends up at the USB port, where you can plug in your device.
The cool thing about solar USB charging is that it’s green energy – it doesn’t hurt our planet. It’s also free once you have the charger, and it lets you charge devices when there’s no power socket around – like when you’re camping or during a blackout.
The Components of a Solar USB Charger
To make your own solar USB charger, you’ll need some key parts:
- Solar Panels: These are the heart of your charger. They capture sunlight and change it into electricity.
- Charge Controller: This part controls how much energy goes from the panels to keep your batteries safe.
- Batteries: Batteries store electricity so you can use your charger even when there’s no sun.
- Voltage Regulator or Circuit: This makes sure that electricity goes to the USB port safely.
- USB Port: Where you plug in your device’s cable to get charged up.
Building this isn’t as hard as it sounds, but each piece has an important job in making everything work right and safe.
Also Read: Who makes Westinghouse generators and where?
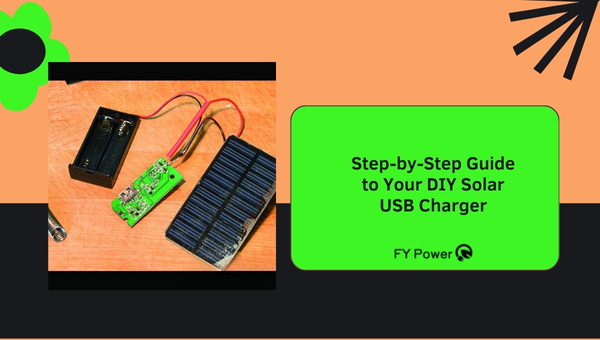
Step-by-Step Guide to Your DIY Solar USB Charger
Gather the necessary materials and tools: To create your own DIY solar USB charger, you will need a solar panel, USB charging circuit, rechargeable battery, and a suitable container or enclosure for housing the components. Additionally, you will need basic tools such as a soldering iron, and wire cut.
Step 1: Selecting Your Solar Panels
When I want to make my own Solar USB charger, the first thing I do is pick good solar panels. Good panels take the sun’s rays and change them into electricity that I can use.
I want to pick boards that are strong and last a long time. This is because good panels will give me more power, and this means my DIY charger will work better.
Step 2: Wiring Your Panels for Maximum Output
After picking the panels, I need to connect them right so they give as much power as possible. There are two ways to wire them: in a series or in parallel. Series means linking one panel’s end to the next one’s start. In parallel, each forum connects side by side.
Series wiring can up the voltage, while parallel will up the current. So I choose based on what needs more for my charger—higher voltage or current.
Step 3: Integrating a Charge Controller
The next step is hooking up a charge controller. It’s like a smart guard between my solar panels and battery; it makes sure nothing gets too full or too empty which could hurt stuff if not carefully watched over time.
Charge controllers stop too much power from damaging batteries by cutting off when full and turning back on when needed again – kind of like how a thermostat works with heat.
Adding this helps make sure everything runs smoothly and lasts longer!
Step 4: Adding Batteries to Store Energy
To keep energy from my solar panels saved up for later, I’ll need batteries – they’re like big energy banks! Good batteries can keep more sun power stored safely until you need it even if there isn’t any sunshine at hand.
I have to pick batteries right so they match how much energy my solar setup makes – not too small because then it won’t hold enough but not overly huge either because that would be wasting space and money.
Step 5: Configuring the Circuit for Safe Power Distribution
In this part, we have to make sure all electronic bits share power fairly without any risk of short circuits or other troubles ruining our device’s downline.
It means looking at volts (electrical pressure) & amps (flow rate) then making adjustments accordingly using bits called resistors or converters so nothing gets fried just trying to get its share of juice!
Setting this up carefully is key because safety always comes first in these sorts of projects alright?
Step 6: Attaching Universal USB Ports
Now it’s about adding places where stuff like phones or tablets can plug in – you know those USB ports? They must go in here somewhere! The trick though? Making ’em work with pretty much anything folks might try charging – since gadgets these days come in all shapes after all…
So we fix some universal types ports; that way anyone can get their gear juiced back up fuss-free wherever might there be needing extra topping off!
It’s quite social tech hospitality – offering accessible charging spots anyone use without headache guesswork yeah?
Step 7: Assembling and Enclosing Your DIY Charger
The last part is putting all things together strong enough to resist nature’s moods while still letting easy access checking on elements inside in case something goes haywire and needs quick fixing see?
A good box keeps everything clean and dry plus vents cool overheating; sometimes clear tops help sunlight reach panels fixed within quite neatly done say myself!
Remember tight seal gaps avoiding water dust spoil handy work but nosey doesn’t mean air-blocking completely else overheat passing though yikes watch out!
Also Read: Powering Possibilities: What Can a 7000 Watt Generator Run?
Safety Considerations When Building & Using Your Charger
When building and using your charger, it is important to take safety considerations into account. Firstly, make sure that all electrical components and wiring are properly insulated to prevent any risk of electric shock.
Additionally, ensure that the charger is compatible with the voltage and power requirements of your specific device to avoid any potential
When I’m putting together a solar USB charger, I always pay close attention to safety. Making a solar USB charging system sounds cool, but it involves working with electricity, and that comes with some risks. Below are some key safety steps I make sure to follow:
Safety Guidelines for Making a Solar-Powered USB Charger
- Check Each Connection Carefully: Make sure the positive wires are connected to the positive terminals and the negative wires to the negative ones.
- Avoid Power During Assembly: Ensure no power is passing through by keeping panels covered or disconnected.
- Double-Check Before Testing: Inspect all connections again before powering anything up.
- No Shortcuts with Electricity: Remember, correct assembly is crucial for safety and functionality.
- Insulate Exposed Wires: Use electrical tape or heat-shrink tubing to cover any bare wires.
- Test with a Multimeter: Before finalizing assembly, use a multimeter to test that all parts are working correctly.
- Wear Protective Gear: Donning rubber gloves can protect against electric shocks during assembly.
- Seek Help if Unsure: If anything seems confusing or wrong, ask someone with knowledge for assistance.
Always prioritize precision and caution in each step to ensure a safe and effective solar USB charger installation.
Advancements in Portable Charging Technology
Advancements in portable charging technology have revolutionized how we stay powered on the go. With smaller and more efficient batteries, fast charging capabilities, and wireless options, we can now easily keep our devices charged and connected wherever we are, empowering us to work, play, and communicate without the fear of running

Future Trends in Solar Power Banks
In the world of charging gadgets, solar power banks are getting more attention. People like them because they work with the sun’s energy and you can carry them around. But what’s new for these handy devices? Let’s talk about what changes and improvements we may see soon.
One exciting change is that solar power banks might get even smaller. Imagine a solar charger that fits easily in your pocket! Also, we’re looking at better materials that pick up more sunlight. This means they could charge faster even on not-so-sunny days.
Next, think about cables. What if you didn’t need them at all? Some future solar chargers might need you to put your phone on top – no plugging in required! This uses something called wireless technology, which is like magic – it transfers power without wires.
Now let’s look at how long they last. Working on making the batteries inside stronger means your solar charger could hold energy longer for you to use later when there’s no sun.
And here’s an interesting bit – many of us have different gadgets that all need charging. Soon, we may see multi-device charging from one single solar power bank. That means juicing up your phone, tablet, and headphones all from one unit!
The really cool part comes with smart features; imagine a screen telling you how much power is left or how quick it’s charging up. We could even control our solar chargers with our phones through apps.
Lastly, let’s not forget about our planet – eco-friendly designs are a big deal now! Solar chargers are already green since they use sunlight, but making sure the rest of the materials are good for Earth is also taking center stage.
So there you have it – portable charging technology isn’t only getting smarter and stronger but also kinder to our pockets and planet!
Also Read: Who makes Westinghouse generators and where
Conclusion
I hope this simple guide inspires you to take on a solar USB charging project. With the detailed steps I’ve described, making your own solar USB charger should be a breeze.
Remember, not only are you creating a portable source of power for your gadgets, but you’re also doing your bit for the environment by harnessing clean, renewable energy. This DIY venture taps into your creative side and serves to remind us how rewarding it is to build something with our own hands.
Important Takeaways:
- Solar USB charging harnesses sun power.
- Essential parts: solar panels, controller batteries.
- Follow the steps for efficient setup.
- Safety is crucial during assembly.
- Portable solar charging is advancing fast.