Are you on the hunt for an easy, cost-effective way to beautify your outdoor space at night? Do you dream of creating a serene, illuminated haven in your backyard without straining your pockets? Well, brace yourself because DIY solar string lights may be right up your alley! Not only are they economical and earth-friendly, but they also add a unique splendor to every area they grace.
DIY solar string lights are essentially LED lights that use the energy absorbed from sunlight for illumination. As soon as dusk sets in, these delightful lights come alive like twinkling stars suspended in the sky. An opulent makeover for your garden or patio is just steps away by installing these self-made gems!
What You Can Expect from this Read:
- Detailed guide on making DIY solar string lights.
- Beneficial insights on installation and maintenance.
- Tips on optimal positioning and effective usage.
- Strategies to safeguard against adverse weather conditions.
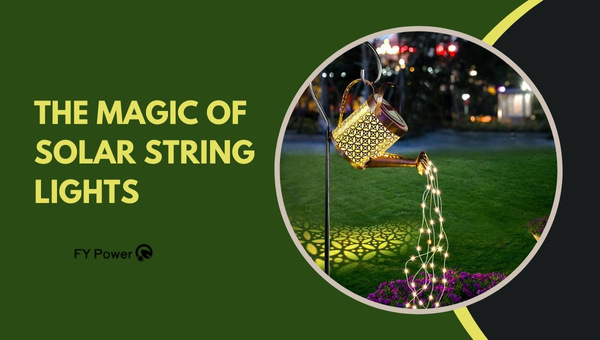
The Magic of Solar String Lights
Every night when I step outside, the sight of tiny twinkling lights spread across my garden gives me joy. And these aren’t just any lights; they are DIY solar string lights. They have transformed my outdoor spaces into a magical nighttime wonderland.
Why Choose DIY Solar String Lights?
So why did I choose these solar-powered gizmos? Well, several reasons compelled me.
- Cost-Efficiency: One of the primary benefits of solar string lights for your garden or patio is the saving on electricity bills. Once installed, they draw their energy entirely from the sun, reducing energy costs to virtually zero.
- Environmentally Friendly: Another main reason was their eco-friendliness. Solar string lights use Renewable Solar Energy, which does not release any greenhouse gases or pollutants in the environment.
- Energy Savings: As the name implies, solar string lights harness energy directly from the sun! This means during the day they charge up and after sunset use this stored energy to light up your outdoor spaces relentlessly without consuming any extra power.
- Easy to Install: Installing solar string lights is undemanding and can be accomplished with minimal assistance and tools. Their straightforward installation process encourages even non-technical individuals like myself with limited prior experience to venture forth into this DIY project.
- Freedom of Creativity: With a range of different styles available (from fairy-style LEDs to vintage-looking bulbs), you can let your creativity run wild when deciding where and how you want them hung up.
How Do Solar String Lights Work?
Now that we have established why these charming little devices make for an excellent addition, let us try and understand how they work in simple terms.
Put, DIY solar string lights consist of two main parts: the solar cell and the LED lights. The solar cell is attached to a rechargeable battery, which charges throughout the day with sunlight. Remember, the more sunlight it absorbs, the more light it will produce in the evening.
When dusk sets in, a built-in light sensor comes into play triggering the LEDs to illuminate. To put it simply:
- Solar Cells Absorb Sunlight: During daylight hours, solar cells receive sunlight and start generating electricity.
- Electricity Charges Battery: This electricity is then used to charge up an in-built battery.
- Automatic Activation: As evening approaches and natural light decreases, a sensor automatically detects this change and triggers your string lights.
- Let there be Light!: Powered by its stored energy from during the day, your DIY Solar String Lights brighten up your desired area without you having to lift a finger!
With these simple steps that work on repeat every day, you can create using DIY Solar String Lights for outdoor spaces like patios or balconies that are lit efficiently each night with zero maintenance.
Also read: Power Consumption Of Household Appliances
Assembling Your DIY Solar String Lights
What brings more magic to your garden or patio than a swarm of dainty lights twinkling in the twilight? Sure, there are plenty of options for outdoor illumination – lanterns, fire pits, and even professional-grade landscape lights.
But DIY solar string lights add a unique touch of charm that checks all the boxes. Not only are they hugely cost-effective and energy-saving (tick!), but they’re also super fun to assemble.
Materials Needed for Your Project
Excited already? So am I! Let’s start with the list of needed materials. Trust me, preparing beforehand saves quite some scrambling later on when we get our hands busy. Here’s what you need:
- Solar Panel: You can buy this from any hardware store or online.
- Rechargeable Batteries: These provide power to your lights when the sun goes down.
- A Battery Holder: This acts as a safe house for your batteries.
- LED String Lights: It is advisable to use low-wattage LEDs because they use less power.
- Diode: The diode prevents battery discharge during dark hours and can be easily found in an electronics store.
- Wire: You’ll require certain lengths of wire to connect all components together.
Step-by-Step Guide to Making DIY Solar String Lights
Now that we’ve gathered our tools and supplies, let’s make our own DIY solar string lights! I’ll break down the process into manageable steps.
- Connect Your Components: First, you want to connect your solar panel to your battery holder using a diode. The diode should be placed in between these two components, facing towards the battery holder.
- Please bring in the Lights: Now it’s time to connect those sparklers! Hook up one end of the LED string lights with your battery holder.
- Seal It Up: Once all connections are safely made, sandwich all your assembled items (battery holder and connected wires) between two small pieces of plastic or cardboard and seal it with duct tape or glue.
- Securing Solar Panel: Now it’s time for our Sun-loving solar panel! Make sure it is fixed at a strategic location where it can catch plenty of sunshine for maximum power input!
- Light Testing: By now, everything should be put together nicely — wouldn’t this be a perfect moment to see how well our DIY solar string light works? Just ensure that the batteries are fully charged prior to testing!
Also read: Who Makes Predator Generators
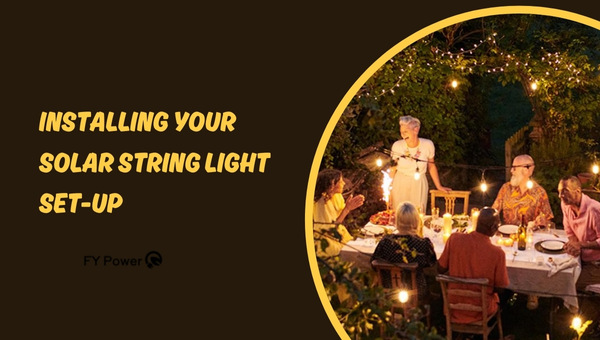
Installing Your Solar String Light Set-up
Once you’ve assembled your DIY solar string lights, it’s time to start the installation process. This part of the guide will take you through the crucial steps of finding the best location for your solar panels and how to mount your lights safely.
Choosing the Best Location for Your Panels
The location of your solar panels is vital for effective charging. You’ll want to choose a spot that sees plenty of sunshine throughout the day.
- Consider Sun Exposure: Your solar panels need as much sunlight as possible to charge efficiently. Look for an area in your outdoor space that gets a good amount of direct sun during daytime hours.
- Avoid Shaded Areas: While it might be tempting to place your panels in a shady spot to protect them from heat, doing so will severely limit their charging capacity. Remember, these are “solar” string lights – they need the sun to work!
- Think About Accessibility: The position should also be readily accessible for maintenance without any hindrance—it makes cleaning easier!
Mounting Your DIY Solar String Lights Safely
Ensuring that you mount your DIY solar string lights safely is just as important as placing them correctly:
- Understand Your Outdoor Space: Take time to understand where you’d like to hang these strings – on patio railings, across garden paths, or even around a gazebo or balcony are great options.
- Use Light Clips: Consider using light clips for a less damaging installation and easy removal. They are also great for securing lights to gutters, fences, or railings.
- Avoid Obstructions: Ensure there are no obstructions in the path of the solar panel’s sunlight.
- Safety First: Never try climbing unstable structures or trees without proper safety equipment —better safe than sorry!
Also Read: What Will A 10000 Watt Generator Run?
Maintaining Your DIY Solar String Light Set-Up
Once your DIY solar string lights are installed and illuminating your outdoor space, it’s crucial to keep them in top shape. Maintenance is the key to ensuring their longevity and performance. This involves two main tasks: keeping the panel clean for maximum efficiency and dealing with weather elements.
Keeping The Panel Clean for Maximum Efficiency
Now, you might ask, “How can I make sure my solar string lights run at their highest efficiency?” The most effective way is by maintaining a clean solar panel. You see, dirt and dust accumulation on the solar panel can limit sunlight penetration, affecting energy absorption and thereby reducing the efficiency of your solar string lights.
Here’s how you can do it:
- Regular Cleaning: Schedule regular cleaning sessions every month. A gentle wash with warm water will work wonders.
- Soft Cloth: Only use a soft cloth; avoid abrasive materials that could scratch or damage the surface of the panels.
- Soap Solution: In case of stubborn dirt or bird droppings, a mixture of mild detergent or dish soap with warm water can be used.
- Wiping Dry: After washing, don’t just let it air dry; wipe down the panels dry to avoid water spots which could also interfere with efficiency!
Dealing With Weather Elements
What happens when nature throws curveballs at you like rain or wind? Well-preparedness is everything! Here are some measures to ensure your lights stay glowing despite adverse weather conditions:
- Waterproof Lights: When buying, make sure to select solar string lights that have a waterproof rating. This ensures they can withstand rain without damage.
- Secure Mounting: For wind protection, secure the lights properly when installing. Use cable ties or clips, and make sure they’re tightly fixed to prevent them from blowing away.
- Cover The Panels During Storms: If a heavy storm is forecasted, it’s wise to protect your panels by covering them with a tarp or plastic sheet.
- Relocating In Extreme Weather Conditions: Consider taking down and storing your solar string lights indoors temporarily in the face of extreme weather like hurricanes or hailstorms!
FAQs
Can my homemade/DIY setup withstand bad weather?
Yes, if constructed properly and with appropriate measures taken, your DIY solar string lights can easily withstand adverse weather conditions. To ensure longevity, it would be wise to mount them in a location that offers some protection.
Are there any risks involved with setting up my own DIY solar string lights?
Risks are inherently attached to every form of DIY project. For solar string lights, the primary concern would be proper installation. A weak or incorrect setup might result in the unit falling or performing ineffectively.
How long do the lights stay on once fully charged?
Upon full charging during daylight hours, the most efficient solar string lights can provide illumination for between 6-8 hours at night. However, this lifespan heavily depends on the quality of the solar panel and batteries used in your DIY project.
Conclusion
Harnessing the sun’s power with DIY solar string lights is not only a cost-effective choice but also an eco-friendly approach to illuminating your garden, patio, or balcony. By following the guidance provided and investing a little time and effort into assembling and installing the setup, you can create an enchanting outdoor space.
In addition, it’s equally essential to maintain your solar string light set-up for maximum efficiency. Clean panels and strategic placements make a significant difference. Dealing wisely with weather elements will ensure longevity as well.