Imagine a cozy little workshop or a garden shed, all lit up and requiring no electricity from the grid. That’s the charm of do-it-yourself solar shed lights! And if you’re thinking, “Sounds great, but I’m not an electrician!” don’t worry. I’m here to guide you through the process with ease and simplicity.
Are you planning to brighten up your shed in an eco-friendly way? DIY 12V solar shed lights are the answer! Not only will they save on your electricity bills, but they’re also surprisingly easy to set up by yourself. From gathering materials to flicking on your new solar-powered light bulb, every step can be done at home with a little guidance – and that’s exactly what I’ll provide.
What You’ll Gain From Reading This:
- No-fuss guides for assembling solar lights
- Clever placement tips for optimal lighting
- Troubleshooting advice for common hiccups
- Maintenance pointers to keep things shining
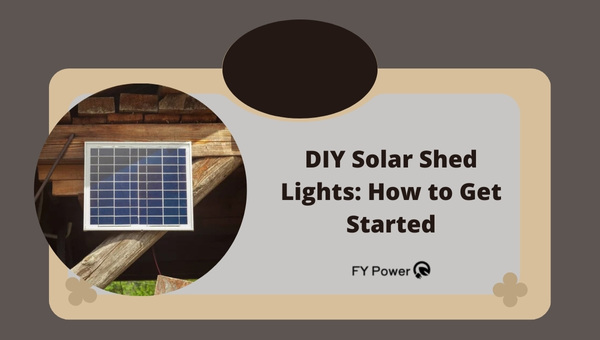
DIY Solar Shed Lights: How to Get Started?
Embarking on a project to build your very own DIY solar shed lights can be more straightforward than you think. It all starts by gathering the necessary materials and preparing appropriately.
Materials Needed
To successfully assemble your own set of 12V solar shed lights, you will need the following materials at hand:
- Solar Panel: Choose a good quality 12V solar panel. These collect sunlight and convert it into electricity which would power our shed lighting.
- Batteries: Batteries store excess energy generated by the solar panel. Aim for some 12 volt lead-acid batteries or lithium-ion batteries as they come highly recommended for this kind of project.
- Charge Controller: This device manages the power going into the battery bank from the solar array. It ensures optimal charging and prevents overcharging, which could damage the batteries.
- Light Fixture(s): Select optimal 12V LED light fixtures appropriate for your shed size.
- Inverter: Purchase a quality DC to AC inverter for converting electricity from DC (produced by your solar panel) to AC (used by your light fixtures).
- Cables and Connectors: You’ll need electrical wiring to connect all components together, along with some appropriate connectors.
- Mounting Equipment: Brackets or any suitable mounting equipment are needed to fix the panels in place securely.
- Tools: Equip yourself with some basic tools like wire cutters, crimpers, screwdrivers, drill,s and pincers.
Preparation Steps
With all materials ready on hand, let’s prepare ourselves better for this project as follows:
- Site Analysis: Check out the location where you intend to place your solar panel. The area should be exposed to maximum daily sunlight, free from constant shade.
- Sketched Plan: Draw a basic sketch of the arrangement of components including the solar panel, batteries, charge controller, light fixtures, and wiring connections.
- Component Testing: Before assembly, test all your components separately to ensure they are in working condition. For instance, you can expose your solar panel to sunlight and use a multimeter to verify it’s generating electricity.
- Safety Measures: Always prioritize safety while dealing with electrical setups. Make sure to turn off breakers before connecting wires and wear rubber gloves for protection against possible electric shocks.
- Installation Site Preparation: Prepare sites where panels will be mounted and lights fixed inside the shed ahead of time for seamless installation.
- Organized Workspace: Ensure your workspace is well-organized with all tools and materials within easy reach.
Also Read: Choosing The Best Oil For The Generator
Step-by-Step Guide on Setting Up Your DIY 12V Solar Shed Lights
Building your DIY 12V solar shed lights can be an exciting venture. Trust me, it’s easier than you may think if you follow the correct steps for assembly and wiring. Let’s dig in!
Assembling The Components
The first step on our journey is to gather and assemble all the components necessary for our DIY solar shed lights.
- Solar Panel: This significant part of your kit is the energy source that powers your light fixture. You can find these at home improvement stores or online.
- Battery: Look for a rechargeable deep-cycle battery. A 12-volt option is perfect for our project.
- Charge Controller: To ensure the battery doesn’t get overcharged by the solar panel, you’ll need a charge controller.
- Light Fixture: Choose a suitable 12V LED light fixture, considering both its brightness and how well it fits into your shed’s look.
- Wires And Connectors: Wires help transfer electricity from one component to another while connectors are crucial in joining these wires together safely.
Assembling your components should look like this; First, connect the solar panel to the charge controller using wires and connectors provided or bought separately – some boards come with these included so always check before purchasing more!
Next up are inverters, should you require them for alternating current (AC) appliances! Then wire up your battery to this same controller, again following instructions or guidelines available with every device purchase.
Wiring And Connecting Procedures
Now onto possibly one of my favorite parts – wiring everything up! Remember – safety first!
Ensure to follow the specific instructions provided with each component. Every device may have slightly different connection standards, so remember this isn’t a one-size-fits-all guide, and you need to adjust accordingly.
- Solar Panel to Charge Controller: Connect your solar panel’s output wires to the charge controller’s input terminals. Typically, black indicates negative (-), and red or white will be positive (+).
- Charge Controller to Battery: Next, connect the charge controller’s output wires following the same color coordination principles as above. It’s essential not to reverse these connections as it may damage your system.
- Battery to Light Fixture: Following again the color indications, connect your battery directly to your light fixture using a suitable gauge wire ensuring secure connections at both ends.
- Check Your Connections: Lastly, double-check all of your wiring work before proceeding – better safe than sorry!
After you’ve completed these steps and everything is wired up correctly, don’t forget about suitable electrical enclosure or protection for your setup – we wouldn’t want any unexpected short circuits after all! Always check on what kind of electric appliances can run with this setup for safety measures when you decide upon expansions.
Also Read: DIY Solar Lighting Magic: Simple Steps to Brighten Nights
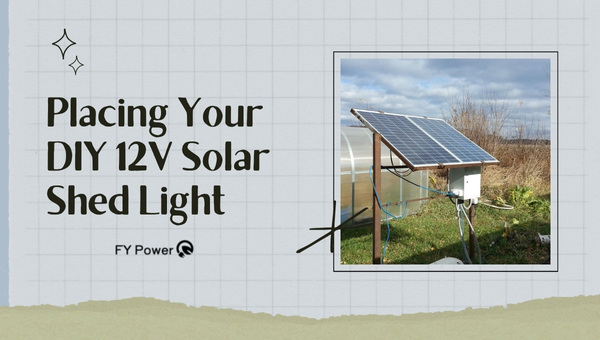
Placing Your DIY 12V Solar Shed Light
Once we have our DIY solar shed lights ready, it comes down to finding the best location for the positioning of our devices. The two main components we need to focus on are the solar panel and the light fixture.
Best Position for the Panel
The correct placement of your solar panel can make all the difference considering its overall performance. Since these panels convert sunlight into power, it is crucial to place them where they can receive maximum sunlight exposure throughout the day.
Step 1: Find a Clear Area: We need an area free from obstructions such as trees, buildings, or anything else that could block sunlight. Shadows falling on your panel will reduce its efficiency.
Step 2: Angle Towards True South (Northern Hemisphere) or True North (Southern Hemisphere): The Sun’s path varies based on our position relative to the equator. Therefore, in order to capture optimal sunlight throughout most parts of a day, angle your panel towards true south if you are living in the Northern Hemisphere and towards true north when residing in the Southern hemisphere.
Step 3: Optimal Tilt Angle: It’s not enough to orient towards the south or north; we must also get the tilt right. The tilt should ideally be equal to your latitude during spring & autumn equinoxes but may need adjustment based on specific periods of the year; summertime calls for less inclination while more steepness works better during winters.
Tips For Placing Your Light Fixture
After being exposed to bright daylight, our DIY 12v solar shed lights are charged up and ready. Where we decide to place these lights will greatly influence their utility factor and indoor aesthetic appeal.
Step 1: Consider Your Needs First: The initial step dictates considering what are you hoping to achieve with your shed lighting. Do you require general, task, or accent lighting? Each has its own needs and positioning rules.
Step 2: Place Higher for More Diffused Light: If you’re aiming for overall illumination, place your lights higher — ideally on the ceiling or additionally high up the walls. This diffuses light more evenly, reducing shadows and harsh lighting effects.
Step 3: Placement Near Work Surfaces for Task Lighting: If your shed is a workspace, installing solar shed lights above or near work surfaces will provide focused illumination without causing hindrance in sightline.
Step 4: Create Dramatic Effects With Accent Lighting: Positioning lights near certain items can create attention-grabbing shadows and highlights. Keep experimenting until you find that perfect angle!
Also Read: DIY Solar Charger: Create 12V Battery Power in 5 Steps
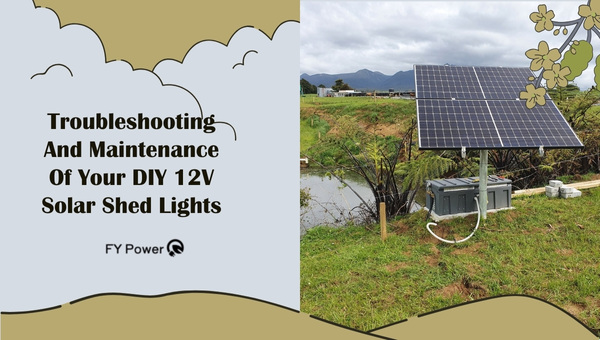
Troubleshooting And Maintenance Of Your DIY 12V Solar Shed Lights
In the journey of running your own DIY solar shed lights, you might come across certain problems. Well! Don’t allow yourself to get flustered; many of these issues are simple enough to fix on your own. Let’s dive into some common problems and their solutions.
Common Issues And Their Solutions
1. Fluctuating Light Output: If your solar shed lights seem to be flickering or not showing consistent light output, the culprit could be a faulty battery connection or capacity issue. To solve this, ensure all connections between the panel, battery, and LED lights are secure expressing the importance of inverter generators vs traditional generators. If that doesn’t help, check your battery for decay – it might need replacing.
2. No Light Emission: If there’s no light at all being emitted from your shed lighting setup, then it could indicate an issue with either the battery or solar panel. Verify that your panel is working correctly by checking if it charges other appliances in direct sunlight how much can a 7500-watt generator run? If so, then take a closer look at your battery – it might have expired.
3. Dim Lighting: Is your lighting not as bright as before? Weather conditions (like multiple cloudy days) may deplete battery charge faster than the sunlight can replenish it. Make sure you position your panels in optimal sunlight for most of the day to prevent this issue.
Now let’s turn our attention towards regular upkeep. Here are some maintenance steps to keep your 12V solar shed lights running smoothly:
Regular Maintenance Tips
1. Regular Cleaning: Consistent upkeep of your solar panels is key for optimal operation. Dust and debris can block sunlight, reducing their efficacy. It’s good to clean them every month using a non-abrasive cloth.
2. Check Wiring Occasionally: Buyers often overlook wire durability during installation, resulting in quicker wear and tear Generac generators oil types and capacities. Make sure to inspect the wires routinely for any damage or loose connections.
3. Battery Health Checks: Around every six months, see if your battery needs topping up with distilled water – this can significantly increase its lifespan.
4. Replace Bulbs As Required: If your bulbs are aging or have burned out, replace them immediately for continuous bright light emission.
These strategies should help you prevent common issues related to DIY solar shed lighting as well as maintain the system in optimal condition over time!
FAQs
What are some safety measures when setting up my own 12v solar shed lights?
Ensuring you have the correct and full safety equipment is a must, such as gloves and eye protection. It’s recommended to work with a partner if possible, especially during the wiring process. Lastly, always remember to switch off your power source before starting any work.
How long do homemade LED lights last?
Generally speaking, DIY LED lights can last up to 50,000 hours depending on usage and maintenance. Regular checkups can help prolong their lifespan.
Do they function during cloudy weather?
Yes, they do! While solar panels perform best in sunny conditions, they can still draw energy even on cloudy days or indirect sunlight. However, note that the efficiency may reduce compared to sunny days.
Conclusion
After much effort and dedication, we can now proudly say that our DIY solar shed lights project is a success! The journey to creating our own 12V solar shed light has surely been an incredible one.
I’m optimistic that the whole process was insightful and engaging, allowing us to expand our knowledge while achieving energy-efficient lighting in our sheds. Not only did we embrace sustainable energy use, but also capitalized on the wealth of sunlight accessible to us daily.
Key Takeaway Points
- With simple components like a solar panel, charge controller, battery, and light fixture, one can set up their own DIY solar shed lights.
- Proper positioning of the panel is crucial for optimal performance.
- Regular maintenance ensures the longevity and efficiency of the system.
- Troubleshooting common issues can be managed with a basic understanding of how the system works.