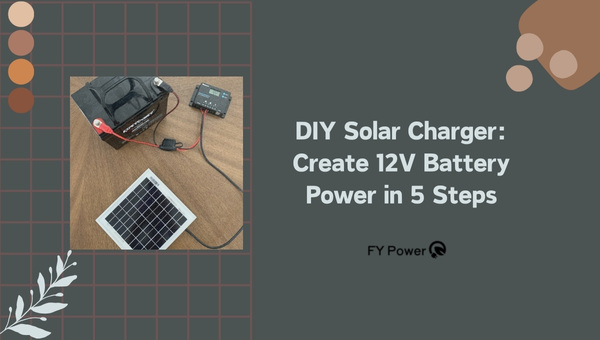
Isn’t there something magical about the glow of lights in a jar? The creative possibilities are endless when you mix creativity, a pinch of effort, and DIY Mason Jar Solar Lights.
Whether for your outdoors or indoors, illuminating your spaces with this DIY project can add an enchanting and warm touch to your environment. Imagine this – sitting under the stars gazing at the shimmering lights that were all handmade by you. Sounds exciting, right?
Creating DIY Mason Jar Solar Lights is not only an exciting task but also a rewarding one. By following just simple steps, you can transform ordinary mason jars into exotic solar lamps that emit warm, inviting light!
All it requires is assembling some accessible materials and investing some love and patience into building them. So why wait? Start adding shine to your home now!
So Much To Discover!
- Step-by-step process to craft beautiful mason jar solar lights
- Handy tips on sourcing materials economically
- Achieve personal touches reflecting your style
- Sustainable choices contributing to the environment
- Tackling common issues like battery life or water resistance with ease
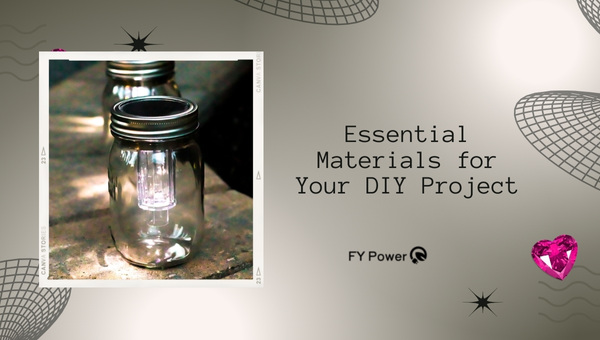
Essential Materials for Your DIY Project
Tackling a DIY project requires not just skills and creativity, but also the right tools and materials. We have compiled a list of essential items you’ll need to successfully complete any DIY endeavor. Let’s delve right in.
The Must-Have List
- Mason jar: The first thing on your list should be a mason jar, and any size will do, depending on the look you’re going for. Remember, these jars will house the light and all the other components.
- Solar light unit: These are small devices that collect sunlight during the day using a built-in solar panel, storing it as energy to provide light when it gets dark. They are also known as solar path lights.
- Super glue or hot glue gun: This is to ensure all components stay fixed and secure within the mason jar.
- Spray paint (optional): Depending on how creative you want to get with your project, choose a color of spray paint to customize your mason jar’s look.
Sourcing Your Materials
Now that we have our must-have list ready, let’s dive into where we can source these materials affordably and conveniently:
- Local stores or online marketplaces: Your basic search destinations would include local craft stores or general stores in town as they usually have mason jars available readily in different sizes and shapes. Online marketplaces like Amazon also offer an array of choices, often at competitive prices.
- Repurposed materials: Do you remember those old glass jars lying in some corner? See if their size matches what’s required and give them a good wash before use – talk about being sustainable!
- Quality over price: When looking for solar light units, make sure you’re sourcing quality items over cheap alternatives as these directly affect how long your lanterns will glow.
- Local hardware stores: Your nearest hardware shop would be your best bet for finding a hot glue gun or super glue. These items are staples in such stores.
Also Read: Power Consumption of Household Appliances
Step-by-step Guide to Crafting Your Own Mason Jar Solar Light
Making your own DIY Mason Jar Solar Lights is a fun and easy project. By following these instructions, you’ll have a beautiful and practical addition to your home or garden in no time.
Preparing Your Mason Jars
The first step in creating your DIY Mason Jar Solar Lights is to prepare the jars. Ensuring they’re clean and ready for use will provide the best possible outcome for your project.
Step One: Collect as many mason jars as you need. They can be any size, but they need to have a lid.
Step Two: It’s time to clean up those jars! If there are labels or residue on them, soak them in warm soapy water for at least 10 minutes. Also, remember that cleanliness is crucial – the cleaner our jar, the better our solar light will look!
Step Three: Once soaked, gently scrub off any remaining residue with an old toothbrush or soft cloth. Rinse thoroughly.
Step Four: Now we want our jars completely dry before moving on. You can let them air dry or wipe down with a dry towel if you’re eager to get moving with the next steps!
Overall it’s straightforward – collect, clean, rinse, and dry! And though these steps may seem simple — remember that a well-prepared jar sets up success for all of our following steps!
Assembling the Solar Light Unit
Now that we have our mason jars cleaned and dried – it’s time for some real fun! Let’s start assembling!
Step One: Gather solar lights. These are readily accessible online or at any garden store. The important thing is they need to be compact enough to fit into your jar’s lid.
Step Two: Unscrew the lids from your now clean mason jars. We’re interested in the circle part – it’s where we’re going to house our solar light.
Step Three: Now, if you’re wondering how to attach the solar light to the lid, it’s surprisingly simple! Center your light on the lid and trace around it. This will give us a perfect-sized guide for cutting out a hole.
Step Four: Once traced, use any sharp tool to cut down along those lines. Proceed with caution – safety first!
Step Five: Now is the time for us to place our solar light into that freshly cut hole. It should fit snugly. If not, make necessary adjustments until it does.
In short – buy lights, separate lids, trace and cut holes on them accordingly—fit in lights onto those prepared lids—Voila! You have made an amazing Solar Light Unit! These small actions can lead you toward big achievements!
So here ends my walk-through of crafting your own DIY Mason Jar Solar Lights – a wonderful blend of functionality and charm that’ll liven up any space! Keep experimenting with different jar styles or colors – and see what best reflects YOU!
Also Read: Who Makes Predator Generators?
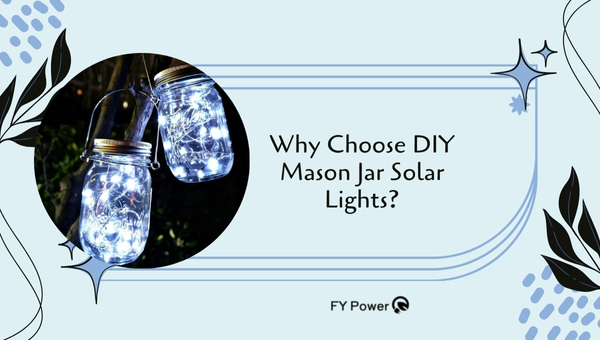
Why Choose DIY Mason Jar Solar Lights?
Choosing DIY Mason Jar Solar Lights is a smart move for anyone who loves getting crafty while caring for the environment. They offer a unique blend of eco-friendliness and charming aesthetics, lighting up spaces with a gentle, personalized touch that’s powered simply by the sun.
Sustainability and Eco-friendliness
When I think about lighting up my garden or balcony, I want something that looks pretty but also doesn’t harm the earth. That’s why I like using mason jar solar lights. They are a smart choice for a few reasons. Here, let me tell you why they are good for our planet:
- Solar power: These lights use energy from the sun. This means they don’t need electricity that comes from burning coal or gas, which can be bad for our air.
- Rechargeable batteries: Inside these solar lights are batteries that can be charged again and again with sunlight. So, we don’t have to keep buying new batteries that end up as trash.
- Recycling glass jars: Mason jars are often left over from jams or sauces we buy. By turning them into lovely lights, we are recycling and keeping glass out of landfills.
- Less light pollution: Believe it or not, too much light at night can confuse birds and bugs. Since solar jar lights aren’t super bright, they’re friendlier to wildlife.
Aesthetic Appeal and Versatility
Now let’s chat about how mason jar solar lights make everything more beautiful:
- Soft glow: The light from these jars is gentle and calming. It gives a cozy feel to any corner of your yard or room without being too sharp on the eyes.
- Different colors and designs: You can put colored stones or paint the jars for a splash of color. Some hang them on trees while others place them along pathways – each way adds its special touch.
- Use anywhere: These handy jar lights look great both outside in gardens and inside on windowsills or tables.
- Customizable theme: Depending on the season – think oranges in fall or reds during Christmas – you can adapt your jars so they always fit right in with your home’s look.
Also Read: What will a 10000 watt generator run?
Personalizing Your DIY Mason Jar Solar Lights
Creating DIY Mason Jar Solar Lights is more than a crafting project; it’s an opportunity to inject a piece of yourself into every light.
Whether you choose to paint, adorn with ribbons, or fill them with colorful trinkets, each jar becomes a reflection of your unique style and creativity—a twinkling expression of personality for everyone to see.
Design Ideas to Reflect Your Style
When I make my own DIY Mason Jar Solar Lights, making them look just right for my space is a must. It’s not just about lighting up a spot; it’s about adding that personal touch that says “me.” Here are some ideas:
First, I can play with colors. Painting the outside of the jars can change how the light spills out into the world. I love using frosty paints for a soft glow or maybe bold, bright colors for a party feel.
Using stickers or stencils before painting can create amazing patterns once the paint dries. When I light up these jars at night, they throw beautiful shapes all around, like stars or leaves dancing on the walls.
Another fun thing to do is fill the jar partway with something that sparkles: glass stones, crystals, even sand and seashells. The light hits these bits and pieces in brilliant ways—like tiny fireflies caught inside.
Ribbons tied around the rim or handles made from twisted wire add even more personality to my jar lights. Some folks like to hang beads and baubles from these wires so they rattle softly in the breeze.
Even though these jars are already special because they use sunlight for power using solar energy, each one can tell its own story depending on how I dress it up.
Outdoor vs. Indoor Usage Tips
When using items either outside or inside, you might need to make changes. These tips help make sure your things work right and last long no matter where you use them.
Outdoor Usage Tips:
- Weather Protection:
- Cover items to guard against rain and sun.
- Use waterproof or UV-resistant materials.
- Stability:
- Make things heavier or fix them to the ground so the wind can’t blow them away.
- Use stakes, sandbags, or bolts for securing.
- Maintenance:
- Clean often since outdoor stuff gets dirty quickly.
- Check for rust on metal parts.
- Safety:
- Keep things away from fire pits or grill zones to avoid burns or fire hazards.
- Have a safe zone for playing stuff so games don’t go into the streets.
- Electric Items:
- Only use cords and tools meant for outside.
- Keep electric gear dry; use outdoor extension cords.
Indoor Usage Tips:
- Space Saving:
- Choose items that fit your room size.
Collapse or fold things when not in use.
- Choose items that fit your room size.
- Floor Protection:
- Put soft pads under heavy stuff to prevent scratches on floors.
- Lay rugs down in play areas to save your floor from spills and stains.
- Ventilation:
- Open windows if you’re using something that makes the air dirty (like paint).
- If it smells strong, don’t bring it inside so your air stays nice to breathe.
- Noise Management:
- If something is loud, try not to use it when people need quiet (like at night).
- Put noisy things on thick mats so they make less noise by shaking the floor less.
- Lighting Adjustments:
- Bright lights are good for reading but soft lighting is better for relaxing times.
- Use curtains to control sunlight that comes in which heats up the room too much during hot days.
You might have noticed some extra care goes into using stuff outside because the weather is unpredictable and can be tough on items! Meanwhile, indoors is all about keeping your space comfortable and suitable for different activities while also taking good care of the place where you live, work, or play!
Troubleshooting Common Issues with DIY Mason Jar Solar Lights
When I first got into making DIY Mason Jar Solar Lights, it was so exciting to see them light up without any wires or plugs. They’re really simple and you can place them all over your yard or in your house. But as with anything, sometimes you might run into a little trouble.
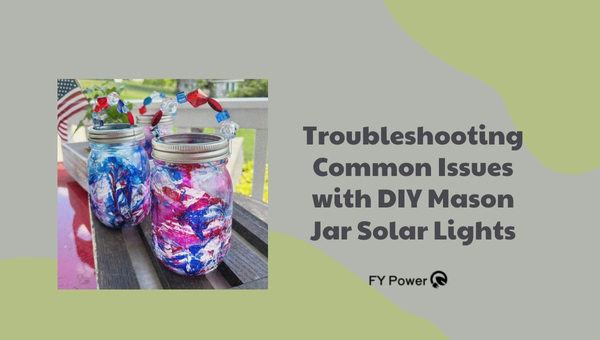
Don’t worry, I’ve been there too, and I’ve figured out how to fix these issues. Let’s get those solar lights shining bright again!
Battery Life Woes
One issue that can pop up is with the batteries inside the solar lights. You might notice that over time they don’t stay lit as long at night or maybe they don’t light up at all anymore.
Here are some things you can do:
- Change the batteries: Just like a remote control, sometimes you need to put in fresh batteries. Pick the right size and kind of battery for your solar lid.
- Clean the solar panel: The small panel on top of the lid needs sunlight to charge up the battery during the day. If it gets dirty or cloudy, it won’t work well. Please give it a gentle wipe with a soft cloth.
- Place in direct sunlight: Make sure your jars are sitting where they can soak up lots of sun during the day.
- Check for water damage: If water gets inside, it could mess up the battery or other parts of the light unit.
Water Resistance Worries
Another concern for outdoor lights is water getting into your jars when it rains or if they’re near sprinklers. Here’s what you can do to avoid that:
- Seal your lids tight: When you put together your jar and lid where all the light bits are, make sure it’s on real tight so water can’t sneak in.
- Use outdoor sealant: You know that stuff people use around windows and doors to keep out drafts? It’s called sealant; putting some around where your jar threads meet your lid can help keep water out too.
- Pick a spot under cover: If there’s a place outdoors but still protected from rain – like under an eave – that could be a good home for one of these lights.
Conclusion
Crafting DIY Mason Jar Solar Lights has been a wonderful journey. Through every step, from gathering materials to the final touch of personalization, I’ve realized the beauty and benefit these lights bring into our lives.
Not only do they add a charming glow to any setting, but they also demonstrate how we can use sustainable sources of energy in our everyday lives—showcasing eco-friendliness with style.