Have you ever thought about making your own solar-powered gadget? Imagine having the ability to charge your car battery anytime, free from the sun’s energy.
This is where a DIY solar charger comes into play. Not only can it help lower bills, but it’s also a fun project that anyone can tackle. With the cost of living soaring, finding ways to save money is vital. Plus, you get bragging rights for building something with your hands!
Building a 12V solar car battery charger is simpler than you might think. Whenever I look at my car sitting in the driveway under the bright sun, it hits me – all that untapped energy could keep my car ready to go without costing me a penny! So how do I harness this power?
All you need are some basic components like solar panels, a charge controller and some wires! Just connect them carefully following safety guidelines, and before you know it, your very own sun-powered charger will be fueling up your vehicle’s battery.
What You’ll Discover Right Here:
- Straightforward instructions on building a charger
- The inside scoop on choosing quality parts
- Key safety measures to follow during assembly
- Hints to maximize your charger’s efficiency
Understanding Solar Charging Technology
Solar charging technology is a method of harnessing the power of the sun to charge electronic devices and batteries. It involves the use of solar panels that convert sunlight into electricity, providing a sustainable and renewable energy source for portable devices such as smartphones, tablets, and laptops.
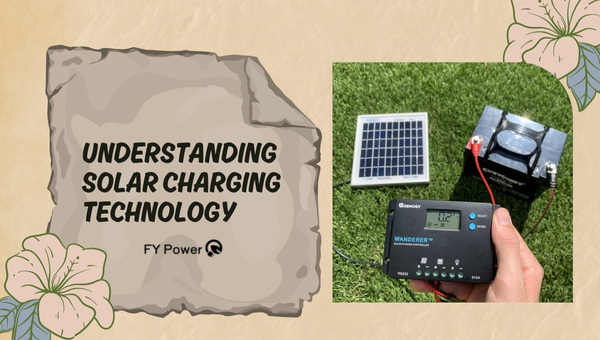
This technology allows users to charge their devices even when they are not connected to the power grid, making it especially useful for outdoor activities or in areas with limited access to electricity.
The Basics of Solar Power
Let me talk about how solar panels make magic happen. Picture this: the sun shines down, and solar panels take that sunlight and turn it into electricity. How? They’ve got these things called solar cells made from silicon, which is like what computer chips are made of.
Here’s what happens step by step:
- Sunlight hits the panel: The sun’s energy comes as tiny packets called photons, and they bombard the panel.
- Photons excite electrons: Inside these solar cells, photons knock electrons loose from their atoms.
- Electricity is created: Free electrons start to move and make an electric current.
- Electricity flows: This current runs through wires to a controller thingy.
Now for car batteries: Imagine your car sitting out all day in the parking lot while you’re at work. Instead of just getting hot, it could be charging up! A solar panel on your car or nearby feeds clean energy right into your 12V car battery through that controller gadget I mentioned (officially called a charge controller).
Also Read: Who makes Firman generators?
Preparing to Build Your DIY Solar Charger
Preparing to build your DIY solar charger involves gathering the necessary materials and tools. You will need solar cells, a battery, diodes, a voltage regulator, a charger controller, and wires.
Additionally, make sure you have a soldering iron, solder, wire cutters, and a multimeter. Once you have all the items ready, proceed to the next steps to start building your solar charger.
Sourcing Materials
To make a DIY solar charger for your 12V car battery, you need the right parts. I’ll tell you where to get them and which are important.
Solar panels: These catch sunlight. Find them at hardware stores or online.
Charge controller: It manages power going into your battery so it doesn’t overcharge. Electronics shops have these or look on the internet.
Batteries: Some projects use new, while others use old car batteries. Make sure they still work well.
Wires and connectors: These connect everything together. Get proper sizes and types for safety and performance. Automotive supply stores usually have these in stock.
Tools: Have a screwdriver, wire cutter, wrench, and multimeter ready for assembling and checking connections. Visit a local tool shop or borrow from someone if you don’t have them.
Always aim for quality materials. It costs more but makes your solar charger last longer with less trouble over time. Look at reviews before buying anything.
Safety First!
When making a solar charger yourself, be safe! Here’s what to keep in mind:
- Work in a dry place: Electricity and water are not friends.
- Wear gloves: Keep your hands safe from sharp edges.
- Protective eyewear: Good when cutting wires or drilling holes.
- Turn off everything when connecting or disconnecting parts: This helps avoid shocks or short circuits.
- Check connection spots: Make sure nothing is loose before testing things out.
- Follow instructions for each piece carefully: Especially the charge controller – it’s got specific steps to follow.
- Fire safety: Have an extinguisher nearby just in case something goes wrong with electricity.
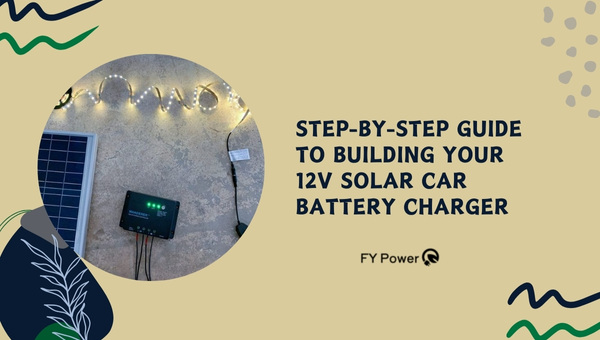
Step-by-Step Guide to Building Your 12V Solar Car Battery Charger
Harness the power of the sun to maintain your vehicle’s battery with a DIY 12V solar car battery charger. This step-by-step guide will help you create a sustainable and efficient charging solution to keep your car battery topped up using solar energy.
Step 1: Assembling Solar Panels
When I start with my DIY solar charger, the first thing I do is sort out my solar panels. To make a solar charger for a 12V car battery, here’s what you need to do with your solar panels:
- Lay out all the solar panels you have.
- Check if every panel is working right. You can shine a light on each one and see if it makes power.
- Now, line up the panels side by side. You want them to cover enough space but also work together well.
- Fix each panel on a backing board or frame. Most people use wood or metal for this.
- Make sure your panels are secure and won’t move around.
Step 2: Wiring & Connections
Next up is connecting everything so it works like one big battery charger. Here’s what you should do:
- Take wires that can handle sunlight and weather changes.
- Connect each panel’s plus (+) to the next panel’s minus (-). This adds up their power to match your battery’s needs.
- Bring the last plus and minus wires down from your setup. These will go into the charge controller (more on that in step 3).
- Make sure connections are tight and covered so they don’t get wet or dirty.
Step 3: Setting Up the Charge Controller
The charge controller keeps your battery safe by making sure it charges right without getting hurt. Do this for setting it up:
- Place your charge controller between where your panel wires come down and where the battery will be.
- Connect those down wires from step 2 into ‘Solar’ marked slots in your controller — plus (+) in plus and minus (-) in minus.
- Check if all lights turn on when you do this.
Step 4: Connecting the Battery
Connecting the battery must be done with care, so follow these steps closely:
- Take two more wires for connecting charge controller ‘Battery’ slots to actual car battery terminals — the red wire should go from charge ‘Plus’ (+) to battery ‘Plus’, and the black wire goes from account ‘Minus’ (-) to battery ‘Minus’.
- Never mix these wires up! Red goes with red, black goes with black always!
- Put fuses as needed so there’s no risk of sparks or fire.
Step 5: Testing Your New DIY Solar Charger
Testing time! To see how well my new charger does its job, here are simple testing steps:
- Clear day? Good! Put your solar array outside under direct sunlight at about noon — that’s when the sun is strongest usually.
- Watch if indicator lights show charging on both the control unit and any indication systems integrated within car batteries typically display when charging commences.
- After some hours – read the voltage on car batteries using multimeter tools – it should be higher than before meaning good signs!
- Test periodically over different days – record how long full charges take especially compare differences in cloudy vs sunny days performances thus gauge efficiency level adequately!
Also Read Tilt Angle for Solar Panels: Optimize Beyond Latitude!
Optimization Tips For Maximum Efficiency
Making your work smoother can help you get more done. A top tip is to sort your tasks by how key they are and how soon they need to be done. This way, you tackle the big stuff right away.
Being smart with your time is crucial, too. Set clear targets and time limits for yourself. This keeps you on track and stops you from spending too much time on things that don’t matter much. Also, make your routine easier by cutting out steps you don’t need and using tools that do simple jobs for you.
Now, if I’m putting together a do-it-yourself solar charger, I aim to get the strongest charge from my solar panels. Here’s some easy advice for getting the best performance out of them:
Placement Matters:
- Put your solar panels where they’ll get lots of sun without shade from trees or buildings.
- In the north half of Earth, face them south; in the south half, face them north.
Getting the Angle Right:
- Aim to tilt your panels at an angle equal to where you are on Earth; a 30-degree spot means a 30-degree tilt.
Cleanliness Counts:
- Wipe away dust and dirt regularly with a soft cloth or brush to let more sunlight hit your panels.
Add Reflectors:
- Reflectors like shiny metal sheets or special materials can direct extra light onto your panels for added power.
Keep these pointers in mind to really tap into all that sunlight! By following these steps carefully from the beginning, we can charge our 12V car battery using pure solar energy.
Troubleshooting Common Issues With Homemade Chargers
Mandatory troubleshooting steps are essential when dealing with common issues that arise with homemade chargers, which can range from insufficient charging power to potential safety hazards due to improper wiring or component use.

When you put in the time to make your own DIY solar charger, it’s a bummer when things don’t work like they should. It’s like when you bake a cookie and it doesn’t taste right. But don’t worry; I’ll help you figure out what might go wrong and how to fix it.
Building Problems
- Sometimes, we might not connect wires the right way. Wires are like roads for electricity, so they need to be hooked up properly.
- The solar panels could be in the wrong spot or angle. They need to see lots of sunlight to do their job.
- Maybe we chose parts that are not so good or they’re broken from the start.
Fixes for Building Problems:
- Double-check all your wires like a list of ingredients in a recipe; make sure each one is in its place.
- Move your panels around until they get enough sun—think of how plants move to catch light!
- Test each part before using it—it’s easier to find bad details before everything is put together.
Operation Issues
During use, things can go wonky, too:
- The battery could stop charging well after some time—like tires on bikes that slowly lose air.
- Dirt or stuff like leaves can cover your solar panels—not good because clean panels are happy panels!
- Sometimes things get old or wear out; nothing lasts forever!
Fixes for Operation Issues:
- If your battery isn’t happy, check if it needs water (if it’s that type) or test if it can still hold charge well.
- Clean your panels regularly! A soft cloth will do – gently wipe away dirt and leaves as if dusting off a treasure map.
- For parts that wear out, replace them with new ones—simple!
Conclusion
To build a DIY solar charger successfully, I’ve walked you through the essential steps from understanding how solar power technology works to testing the efficiency of your own 12V car battery charger.
A project like this not only saves you money but also equips you with valuable knowledge on renewable energy. More importantly, this hands-on experience connects you to a greater cause: utilizing sustainable resources.
Main Points to Remember
- Grasp the basics of solar power and its application in charging batteries.
- Gather all necessary components like a 12V battery and charge controller.
- Prioritize safety while assembling your DIY solar car battery charger.
- Follow each step carefully, from arranging panels to connecting batteries.
- Test your setup thoroughly for efficient performance.