Have you been thinking about adding a little glow to your garden without spending too much money or energy? DIY solar lighting is the perfect way to make that happen. Trust me, it’s easier than you think and it can totally change the feel of your outdoor space when the sun goes down.
Imagine sipping your favorite drink under the gentle, eco-friendly light of your very own solar-powered lanterns. Sounds nice, right? But where do you start?
Starting with DIY solar lighting is as simple as understanding a few basics and gathering some easily available materials. You don’t need advanced skills; just some enthusiasm and maybe a bit of patience.
Once you plan where to put them, get the parts together, and set up everything securely, those cozy lights will soon be ready to shine through summer parties or quiet winter evenings.
What You’ll Gain From This Read:
- Quick steps to eco-friendly illumination
- Save money on electric bills with solar power
- Beginners’ guide to crafting charming nightscapes
- How-to insights for long-lasting outdoor lighting
Planning Your DIY Solar Lighting Project
When planning your DIY solar lighting project, start by determining the specific areas in your home or outdoor space that require illumination.
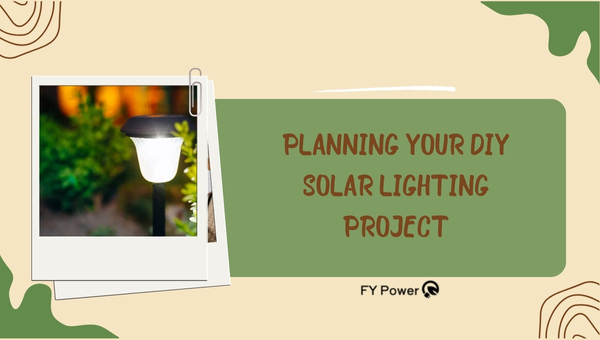
Assess the available sunlight in those areas to ensure they receive sufficient solar energy throughout the day. Consider the type of lighting fixtures you want to use, such as solar-powered lanterns,
Assessing Your Needs Before You Start
When you think about making your own solar lights, knowing what you need is key. You don’t want to start and then realize you missed something important. Here’s what I do to figure out my needs:
- Check the area: Look at where you want to put your solar lights.
- Think about use: Ask yourself, “What will I use these lights for?” Maybe it’s for a path, or to shine on lovely plants in the garden.
- Size matters: The bigger the place, the more lights or bigger ones you might need.
- Count how many: Decide on how many different solar lighting spots there are and how bright they should be.
- Power up: Make sure each light will get enough sunshine during the day to light up at night.
This thought process helps me understand just what I’m in for with my DIY solar lighting project.
Designing Your Solar Light Placement Plan
Getting this step right means your DIY solar lighting shines bright when it’s dark out there. It takes some thinking but here’s how I do it:
- Spot Sunshine: Find spots that get lots of sunlight during the day – sunlight makes them work!
- Shade Check: Watch out for places that might be shady because of trees or buildings.
- High Up or Low Down? Decide if your lights are better high up like on a wall or low down along a path.
- Morning vs Afternoon Sun: Some places get sun in the morning, others later – choose spots that get sun for most of the day.
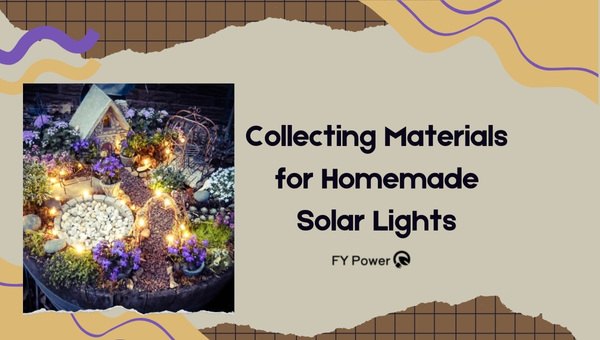
Collecting Materials for Homemade Solar Lights
To create homemade solar lights, gather essential materials such as solar panels, rechargeable batteries, LED lights, and a weatherproof casing. These components enable capturing solar energy during the day and utilizing it to power the lights at night, making them an eco-friendly and cost-effective lighting solution.
Essential Components for Any DIY – A Checklist
When I started to craft my own solar lights, I knew I needed some key things. Here’s my checklist of what to gather:
- Photovoltaic cells: These are the main parts that catch sunlight and turn it into electricity.
- Rechargeable batteries: To store energy, so my lights can glow even when it’s dark.
- LED bulbs: These give out light and are really good because they don’t use much power.
- Wires: To connect everything together.
- A soldering iron: For fixing the wires onto parts where they need to stay put.
- Solder: This is like glue for metals—it helps keep those wire connections strong.
- A charge controller: This little gadget takes care of the battery, making sure it doesn’t get too full or empty.
- Enclosures or jars: Something to hold all these bits inside so they look nice and are safe from the weather.
I make sure I’ve got all this before starting out; it makes things go smoother!
Resourceful Sourcing: Where to Find Affordable Parts?
Finding parts without spending lots of money is kind of like a treasure hunt:
- Local hardware stores: Sometimes they have sales or old stock at low prices if you ask nicely.
- Online retailers: There are loads of sites selling DIY bits and bobs—some have discounts if you buy more than one thing!
- Yard sales & secondhand shops: Other folk’s “junk” might be just what I need, especially for housings like jars or pots that give my solar lights unique charm.
- Community exchanges or forums online: Sometimes people nearby want to trade – maybe someone has spare LEDs in exchange for something else.
Crafting Step-by-Step: Assembling Your First Set of Solar Lights
When it comes to assembling your first set of solar lights, it is important to follow a step-by-step crafting process. Begin by gathering all the necessary materials, such as solar panels, batteries, LED lights, and wires. Next, carefully connect the solar panel to the battery, ensuring proper polarity.
The Heart of The System: Making The Circuit Work
When you start putting together your DIY solar lighting, the most important thing is making sure that the heart of the system, which is the circuit, works properly. Here are detailed steps on how to safely connect all those little electronic parts together.
- Gather All Materials: Before doing anything else, get all your materials together in one spot. You’ll need photovoltaic cells (those are the solar panels), rechargeable batteries (to store the power), an LED bulb (that’s what gives off light), and wires.
- Connecting Wires to Solar Panels: Take a look at your solar panel; there will be positive (+) and negative (-) signs on it. Take a wire and solder it to the positive terminal and do the same with another wire for the negative terminal.
- Attach Rechargeable Battery: Now, find where to hook up your battery. Connect the positive terminal of your battery to one wire coming from “+” on the solar panel, then take another wire from “-” on the solar panel and connect it to the negative terminal of your battery.
- Adding The LED Bulb: Find two legs on your LED bulb; one is longer than the other—that’s typically the plus sign or “+”. You’ll want to tape or solder one end of a resistor (this thing controls electricity flow) onto that longer leg then solder another free end of the resistor onto what’s called the “positive” side of battery.
- Completing Circuit: Now take any remaining cable ends sticking off from the “-” side or bottom part of the LED bulb, and tie this into “-” side or negative part where you attached it earlier onto the battery.
- Test Your Light: Once everything’s tied together correctly—give it a test! Place everything under sunlight so that photovoltaic cells start working; if done right, once darkness falls, your LED should light up!
Do not forget about safety! Always make sure you are careful not to touch hot soldering iron tip and wear protective eyewear just in case something sparks while you’re working.
Shielding From The Elements: Weatherproofing Tips
You’ve put so much effort into making these beautiful lights; we want them shining bright no matter rain or snow! Weatherproofing is super important so they last a long time out there in nature doing their job lighting up dark spots around gardens or paths.
- Sealing Exposed Wires: With electric tape wrap around any wires that might touch the water directly – cover them well so no water can sneak in!
- Use Silicone Sealant: Around edges where different parts come together use silicone sealant—it’s like super-strong glue but made especially for keeping out water!
- Water-Tight Containers for Batteries and Circuits: If possible place batteries inside some quite waterproof box – this could be anything from specific plastic containers sold at stores meant for electronics outside OR even something DIY like a sealed mason jar with holes drilled carefully in the lid for wires but sealed back up once through!
- Checking Points Of Entry For Light Fixtures used outside: Protect the base where lights go into the ground with either more sealant OR sometimes I even put small umbrella-like covers over top of them – anything helps keep rain directly off really helps extend life big time!
- Regular Inspections After Major Weather Events: When weather events occur, it is crucial to conduct regular inspections to assess any potential damage caused. These inspections help identify hazards, structural weaknesses, and infrastructure issues, enabling timely repairs and preventing further harm to individuals and communities. They also help in creating a comprehensive plan to enhance resilience and preparedness for future weather
Also Read: Powering Possibilities: What Can a 7000 Watt Generator Run?
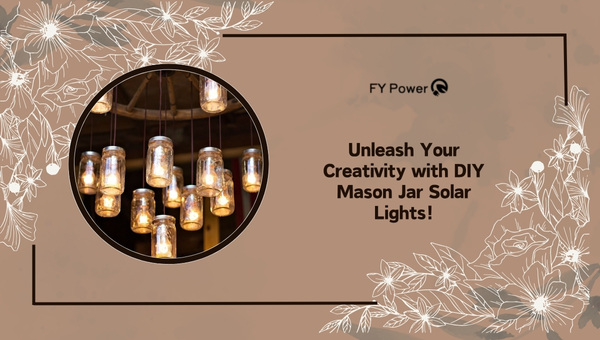
Advantages of Choosing DIY Mason Jar Solar Lights Template
Cost-effective solution: One of the major advantages of choosing a DIY mason jar solar lights template is the cost-effectiveness it offers. By creating your own solar lights using easily accessible materials such as mason jars and solar panels, you can save money compared to purchasing pre-made solar lights.
Embracing Sustainability Through Reuse
I love the idea that I can chip in to help the planet, and that’s where reusing stuff comes into play. Rather than tossing out those glass jars from my kitchen, I give them a new life as solar lights. Here are some ways you can do the same:
- Collect mason jars: Hunt around your home for any spare mason jars or ask friends and family to save theirs.
- Clean them up: Make sure the jars are clean and clear. Stickers or residue could block light.
- Upcycle with purpose: Instead of buying new, we’re reusing these jars, which cuts down on waste.
This way, not only do you save yourself some money, but you also make your little corner of the world a bit greener.
Infusing Personality Into Eco-Friendly Design
Just because something is good for the environment doesn’t mean it has to be boring! With DIY solar lighting, especially using mason jars, there’s a ton of room to get creative:
- Paint: Give those jars an amazing splash of color—maybe some bright sunny yellow or calming ocean blue?
- Patterns and designs: Use tape or stencils to create patterns before painting.
- Accessorize: After the paint is dry, deck out your solar lights with rope handles or hang them with sturdy twine.
- Place with care: Think about where you’re putting them—that spot by your favorite bench could use a touch of charm!
Remember though – if you paint them up too much they might not let through enough sunlight during the day!
By adding my own spin to these lights’ designs, every corner in my garden feels like it has got my personal touch.
Putting together eco-friendly DIY solar lighting like this doesn’t just light up my garden without harming nature—it makes it shine in more ways than one!
Also Read: Who Makes Predator Generators?
Guiding Light – Maximizing Effectiveness Of Your DIY Solar Lighting
When I set out to make my own solar lights, I wanted them to glow as brightly as possible. To do this, I had to figure out the best places to put them and how high they should be. This part is all about making sure the solar lights get enough sunshine during the day and light up the right spots at night.
Optimal Positioning For Maximum Luminosity
The trick to getting your DIY solar lighting to shine brightly is all about where you place it. Here’s what I found works best:
- Find sunny spots: Think about where sunlight hits your outdoor space during the day. You want your solar panels facing up or towards where you see plenty of light.
- Avoid shade: Keep away from areas where shadows fall. Things like large trees or buildings can block sunlight from reaching your solar panels.
- Get the height right: Hanging or mounting your lights at around six feet off the ground usually works nicely. This way, they’re not too low that they get blocked by smaller objects and not too high that their light gets lost in the space.
- Space them evenly: If you’re lining a path or spreading them throughout a garden, space them so each light’s reach almost touches the next one’s. This avoids dark spots.
Time Checks And Regular Maintenance Tips To Keep Them Shining
Just like any other piece of tech in our lives, DIY solar lights need a bit of looking after if we want them to keep working well:
- Clean regularly: Dust and dirt can cover solar panels and dim their performance. Wipe down your panels gently with a damp cloth now and then.
- Check battery life: Every few months, see how well your batteries are holding a charge. They can’t last forever and might need replacing after a while.
- Look for damage: Bad weather can sometimes mess with outdoor stuff like our DIY projects here; check everything over after heavy storms especially.
- Adjust with seasons: The sun’s position changes through the year; tilting or moving your lights might be needed so they get enough sunlight in different seasons.
Also Read: Unleash Your Creativity with DIY Mason Jar Solar Lights!
FAQs
How long do homemade solar lights last?
Homemade solar lights can keep shining for several years. Their lifespan mainly depends on the quality of the components used and how well they’re put together. Regular maintenance can also extend their life.
How do solar pathway lights work?
Solar pathway lights have a small that collects sunlight and converts it into electrical energy, which charges a battery. At night, the battery powers an LED light to illuminate your path.
Are solar path lights worth it?
Yes, They’re cost-effective over time, easy to install, and eco-friendly, and they enhance safety by illuminating walkways at night without adding to your electricity bill.
Conclusion
Wrapping up, and discovering the world of DIY solar lighting has been quite a journey. The joy of crafting your own solar lights not only illuminates the space around your home but also brings an inner glow of achievement. From planning to execution, each step offers a chance to learn and get creative.
Key Takeaways:
- Start by assessing your lighting needs and designing a smart placement plan for maximum sunlight exposure.
- Collect essential components like photovoltaic cells, rechargeable batteries, and LED bulbs for your solar light projects.
- Follow careful steps to make the circuit work and shield your lights for weather resistance.
- Lean into sustainability by incorporating recycled materials in designs like mason jar solar lights.
- Personalize your outdoor lighting DIY efforts with unique touches that reflect your style.
- Ensure optimal positioning of solar garden lights for the best luminosity and perform regular maintenance checks.